Travel scrapbooking is its own distinct genre within the craft. Where everyday memory keeping tends to be gentle, reflective, and domestic, travel albums are expansive. They collect the blur of motorway service stations at midnight, the weight of a boarding pass, the dusty back of a national park trailhead sign, and the particular quality of light in a port town you never expected to love. They are records of who you were in a place that was entirely new to you.
The challenge with travel pages is the sheer volume of material. You come home with hundreds of photographs, a pocket full of receipts and leaflets, and memories that already feel slightly unreal. Without a system, those things end up in a drawer. With even a modest amount of planning — before you leave, during the trip, and after you return — you can turn all of that into album pages that will genuinely stop you in your tracks years from now.
This guide covers the main types of travel scrapbooking, practical organisation strategies, and specific layout ideas for road trips, cruises, national park visits, and map-based pages. It also includes journaling prompts and tips for handling the small ephemera that makes travel albums feel real rather than merely decorative.
Getting organised before you leave
The single most effective thing you can do for your travel scrapbook happens before you take a single photo. Decide in advance what you are going to collect. Experienced travel scrapbookers tend to carry a small zip pouch or envelope in their bag specifically for paper ephemera: restaurant receipts, museum entry tickets, transport passes, leaflets, maps, luggage tags, and any paper object that marks where they were and what they did.
This is worth thinking about deliberately because it is easy to discard exactly the right things. A fuel receipt from a remote petrol station on a Scottish road trip feels unremarkable in the moment. On a layout a year later, it becomes a beautifully specific detail that anchors the whole story. The same goes for a bus ticket from a Croatian port, a pressed flower from a meadow trail, or a paper napkin from a diner that was genuinely special.
- Pack a small flat pouch or kraft envelope labelled with your destination and dates
- Write quick notes on your phone each evening — just a sentence or two about the day's highlight
- Photograph signs, menus, and unusual details as well as people and landscapes
- Request physical maps at visitor centres and tourist offices rather than relying solely on your phone
- Keep boarding passes, rail tickets, and receipts rather than binning them at the end of the day
Choosing the right paper stock in advance also helps. Travel albums often benefit from neutral or map-toned backgrounds rather than heavily patterned papers, because travel ephemera carries so much visual interest already. See our guide to choosing scrapbook paper for advice on selecting backgrounds that let your collected materials do the talking.
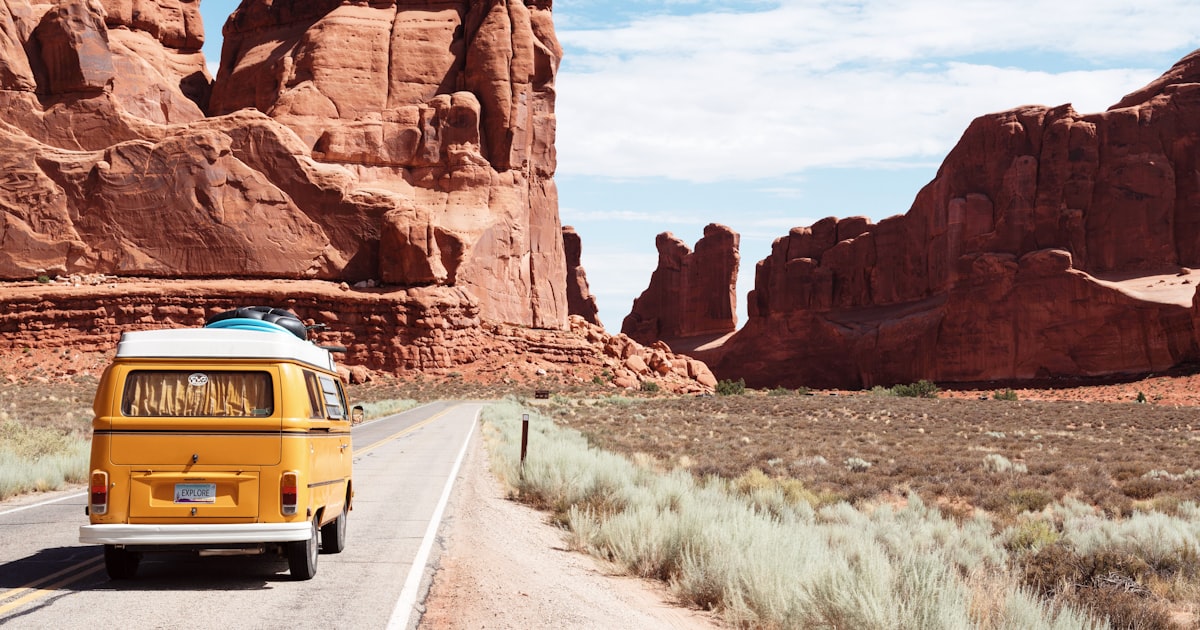
Road trip scrapbook ideas
Road trips generate a distinctive category of ephemera that differs from any other type of travel. There are mile markers and motorway service station receipts, diner menus tucked under the windscreen wiper, layby photographs, and the particular rhythm of days that are partly about moving and partly about arriving. A road trip scrapbook should reflect that duality.
Consider organising road trip pages by leg of the journey rather than by day. Each section of a long drive has its own character: the anticipation of the outward journey, the slowness of the middle stretch, the slightly melancholy feeling of the return. Photographs of the car dashboard, the windscreen view, and motorway signage make surprisingly effective page anchors — they signal movement and give the album momentum.
Fuel receipts, diner menus, and roadside attraction leaflets are the ephemera of road trips. If you collect one paper object per stop, you will have enough material for a genuinely textured album without having to rely entirely on photographs. Layer them behind acetate pockets, tuck them into library-card style envelopes, or use them as journaling backgrounds with handwriting or typed text across them.
Cruise scrapbook tips
Cruises produce a category of ephemera that is almost purpose-made for scrapbooking. The daily programme newsletter that arrives in your cabin each evening, the deck plan map, the shore excursion tickets, the formal dinner menu, and the boarding pass itself — these are all printed, portable, and deeply specific to your voyage. Collect every single one.
Port photographs deserve their own pages rather than being bundled together as a general travel spread. Each port has a different feel: the colour of the buildings in a Mediterranean harbour town, the texture of a cobbled square in a Baltic city, the wildlife visible from a tender in a Norwegian fjord. Give each port a double-page spread or at least a generous single page, and use the excursion ticket or a map extract as the background or anchor element.
- Use the ship's daily programme as a background layer — it gives immediate context and texture
- Photograph the deck plan on the wall and print a copy as a layout element showing your cabin location
- Collect restaurant and bar menus from shore excursions
- Include sea-day pages that capture the pace of being at sea rather than in port
- Photograph the ship from the pier when returning from each excursion — it provides a visual through-line
The boarding pass is worth special treatment. Mount it on a card stock mat, add the sailing dates, and use it as the title page element for the whole cruise album. It immediately signals the voyage and gives readers a clear point of entry.
National park scrapbook pages
National park visits have their own scrapbooking culture, partly because the United States National Park Service produces such distinctive printed materials. Ranger passport stamps — the inkpad style cancellations available at most visitor centres — have become beloved scrapbooking elements. If you visit American national parks, carry a small booklet or a few pieces of white card stock and collect stamps at every ranger station you pass through.
Trail maps and park brochures are equally useful. The topographic quality of a trail map makes a beautiful background layer, especially when you mount wildlife photographs across it and add route-marking details in pen. Tearing the edges of a photocopied trail map gives it an organic quality that feels at home on a nature-themed page.
Consider building a series of pages around the sensory experience of the park rather than just the landmarks. The silence of a forest trail, the smell of pine resin, the weight of a pack at mile twelve — these are details that fade quickly but anchor a page in genuine experience. A journaling block that describes what you heard or felt alongside what you photographed makes for a much richer page than one built on scenery alone.
Map scrapbook pages
Map pages have become one of the most popular directions in travel scrapbooking, and for good reason. Maps are already visual, already layered with information, and already beautiful as objects. Using them as scrapbook backgrounds adds geographic context while providing a ready-made aesthetic framework for the page.
You can use actual maps — folded road maps, atlas pages, tourist office maps — or printed reproductions. A vintage-style map printed on cream or tan cardstock and used as a full background gives a page an exploratory, adventurous feel. Mark your route in pencil or thin pen, add small photo mounts at key locations, and use a hand-drawn star or a wax seal sticker to mark your starting point.
Journaling on map backgrounds works well when the text is contained in a clean white or cream block so it stays legible. Handwritten journaling laid directly on a map can look effective, but only if your handwriting is consistent and the map detail beneath it is not too busy. When in doubt, mount a journaling card on top.
Capturing locations versus experiences
One of the most useful distinctions in travel scrapbooking is between documenting where you were and documenting what the journey felt like. Most travel albums do the first quite thoroughly — they record the landmarks, the mealtimes, the accommodation — but miss the second entirely.
Experience-led pages ask different questions. What did it feel like to arrive? Was anyone nervous, excited, or quietly apprehensive? What was the first thing that surprised you? What did you not expect to love? What would you do differently? These questions produce journaling that turns an album from a visual itinerary into something closer to a travel memoir.
"The best travel scrapbooks capture not just where you went, but who you were while you were there — the small details that geography alone can never hold."
Journaling prompts for travel pages
If you find journaling difficult, a set of specific prompts can make the difference between a page that communicates and a page that simply displays photographs. Try these when you sit down to write:
- What was the first thing I noticed when we arrived?
- Which moment from this day would I most want to relive?
- What was harder than expected? What was easier?
- What did this place smell like?
- What did I want to remember that the photographs didn't capture?
- Who was I travelling with, and what made this trip particular to that group?
- If I could send a postcard from this moment, what would I write?
Recommended layouts for multi-day trips
Multi-day travel albums benefit from a consistent structure that gives readers a sense of progression. A clean approach is to open with a title page (destination, dates, and one strong photograph), follow with a single page per day using a consistent template, and close with a recap or reflection page. The consistency of the day-by-day template makes the album feel cohesive even when the landscapes and colours vary dramatically between pages.
For longer trips — a fortnight's touring holiday, a month-long journey — consider organising by region or experience type rather than day. A week in the Scottish Highlands might become three pages: one for the drive through Glencoe, one for a loch-side stay, one for a distillery visit. Grouping by theme rather than chronology can produce a more readable album without losing the sense of narrative arc.
Our guide to scrapbook layouts for beginners covers the fundamental two-page spread techniques that underpin most travel album approaches, including photo grouping, title placement, and journaling block positioning.
Pocket pages for small ephemera
No travel album discussion is complete without pocket pages. The 3x4 and 4x6 card pockets used in pocket-style scrapbooking are perfectly suited to travel ephemera because they are designed to hold physical objects flat without damaging them. A pocket page grid can hold a boarding pass, a restaurant card, a foreign stamp, a pressed leaf, a small map extract, and a journaling card all on one tidy page.
Use one pocket page at the start of each travel section to hold the key document for that leg of the journey (the confirmation, the ticket, the park pass). Use another at the end to hold the small items that don't have obvious homes elsewhere. This bookending approach keeps your album tidy without requiring you to discard anything with potential sentimental value.
Storing and protecting your finished travel albums is as important as making them. Layered travel pages with real ephemera can be bulky, which means standard binder storage sometimes isn't sufficient. Our guide to scrapbook storage ideas covers album binders, box files, and archival options suited to thick, dimensional pages.